AI
NVIDIA AGX Thor
What is AGX Thor?
NVIDIA Jetson AGX Thor is a high-performance edge AI computing platform designed by NVIDIA for advanced robotics, physical artificial intelligence (AI), and other demanding real-time applications outside traditional data centers.
Installation
- First, you need to download the Jetson BSP installation media (Jetson ISO) image file from NVIDIA's website.
You can go to JetPack Download Page, find the latest JetPack version for Jetson AGX Thor Developer Kit, and download the Jetson ISO image file on to your laptop or PC.
Create installation USB
To install Jetson BSP (Jetson Linux) on your Jetson AGX Thor Developer Kit, we first need to create an installation media by writing the downloaded ISO image to a USB stick.
注意
Caution: You cannot just simply copy the ISO image file to the USB stick on your OS (e.g. Windows Explorer, or Mac Finder). You need to create a bootable USB stick using some special software.
In this guide, we will use Balena Etcher to create a bootable USB stick.
Once you start Etcher, select the downloaded ISO image file, and select the USB stick you want to write the ISO image to.
Install Ollama
$ sudo su
$ export PATH=/usr/local/cuda-13.0/bin:$PATH
$ export LD_LIBRARY_PATH=/usr/local/cuda-13.0/lib64:$LD_LIBRARY_PATH
$ cd /opt

# Fetch the latest Go version dynamically
$ GO_VERSION=$(curl -s https://go.dev/dl/?mode=json | jq -r '.[0].version')        # e.g. "go1.25.1"
$ GO_TARBALL="${GO_VERSION}.linux-arm64.tar.gz"
# Download Go
$ wget "https://go.dev/dl/${GO_TARBALL}"

# remove any old version
$ rm -rf /usr/local/go

# Extract and install
$ tar -xzf "${GO_TARBALL}"
$ mv go /usr/local/

$ export PATH=$PATH:/usr/local/go/bin
$ cd /opt && git clone https://github.com/ollama/ollama
$ cd ollama && cmake -DCMAKE_CUDA_ARCHITECTURES=110 -B build && cmake --build build
$ cd /opt/ollama
$ go run . serve
Test with DeepSeek R1 8B model:
$ export PATH=$PATH:/usr/local/go/bin
$ go run . run --verbose deepseek-r1:8b
Run Ollama on NVIDIA AGX Thor via Docker:
ubuntu@thor:~$ mkdir -p ~/ollama
ubuntu@thor:~$ docker run --name ollama --runtime nvidia -d --network host -it -v ${HOME}/ollama:/data --user $(id -u):$(id -g) ghcr.io/nvidia-ai-iot/ollama:r38.2.arm64-sbsa-cu130-24.04
ubuntu@thor:~$ docker exec -it ollama /bin/sh
$ ollama pull gpt-oss:20b
ubuntu@thor:~$ docker stop ollama
ubuntu@thor:~$ docker rm -f ollama
ubuntu@thor:~$ docker system prune --volumes
Run this command to monitor GPU performance:
$ watch -n 1 nvidia-smi
# or
$ tegrastats
Ollama Service
[Unit]
Description=Ollama Server Service
After=network.target

[Service]
# Run as a non-root user for safety (change 'ubuntu' to your username)
User=ubuntu
Group=ubuntu

# Set working directory
WorkingDirectory=/opt/ollama

# Environment variables
Environment="OLLAMA_HOST=0.0.0.0"
Environment="PATH=/usr/local/go/bin:/usr/local/sbin:/usr/local/bin:/usr/sbin:/usr/bin:/sbin:/bin"

# Command to start Ollama
ExecStart=/usr/local/go/bin/go run . serve

# Restart policy
Restart=always
RestartSec=5

# Output logs to journalctl
StandardOutput=journal
StandardError=journal

[Install]
WantedBy=multi-user.target
$ sudo systemctl daemon-reload
$ sudo systemctl enable ollama.service
$ sudo systemctl start ollama.service
$ sudo systemctl restart ollama.service
$ sudo systemctl stop ollama.service
$ sudo journalctl -u ollama.service -f
Linux Manual Install
$ curl -L https://ollama.com/download/ollama-linux-amd64.tgz \
-o ollama-linux-amd64.tgz
Extracts the contents of the ollama-linux-amd64.tgz and places the extracted files into /usr:
$ sudo tar -C /usr -xzf ollama-linux-amd64.tgz
Run Ollama for tests:
$ ollama serve
Open another terminal and verify that Ollama is running:
$ ollama -v
Make Ollama as a startup service?
The latest version of Ollama will set up user and service for you during installation.
Install CUDA
Checkout the instructions here
Customizing
$ sudo systemctl edit ollama
Alternatively, create an override file manually in /etc/systemd/system/ollama.service.d/override.conf:
[Service]
Environment="OLLAMA_DEBUG=1"
Updating
Update Ollama by running the install script again:
$ curl -fsSL https://ollama.com/install.sh | sh
Or by re-downloading Ollama:
$ curl -L https://ollama.com/download/ollama-linux-amd64.tgz \
-o ollama-linux-amd64.tgz
$ sudo tar -C /usr -xzf ollama-linux-amd64.tgz
View Logs
Linux
$ sudo journalctl -u ollama --follow
macOS
$ tail -f ~/.ollama/logs/server.log
Windows
$ type "$env:LOCALAPPDATA\Ollama\logs\server.log"
Docker
$ docker ps  # find container ID/name
$ docker logs <container-name> --follow
Uninstall Manual Installation
Remove system service:
$ sudo systemctl stop ollama
$ sudo systemctl disable ollama
$ sudo rm /etc/systemd/system/ollama.service
Remove the ollama binary from your bin directory (either /usr/local/bin, /usr/bin, or /bin):
$ sudo rm $(which ollama)
Remove the downloaded models and Ollama service user and group:
$ sudo rm -r /usr/share/ollama
$ sudo userdel ollama
$ sudo groupdel ollama
Ollama Commands
List models:
$ ollama list
Remove a model:
$ ollama rm <model name>
List which models are currently loaded
$ ollama ps
Stop a model which is currently running
$ ollama stop llama3.2
Expose Ollama
macOS
- Stop the Ollama application: Ensure the Ollama app is not running.
- Set the environment variable: Open Terminal and run:
$ launchctl setenv OLLAMA_HOST 0.0.0.0:11434
- Restart Ollama: Relaunch the Ollama application from your Applications folder. It will now listen on all network interfaces.
Linux
- Edit systemd service by calling
sudo nano /etc/systemd/system/ollama.service
[Service]
Environment="OLLAMA_HOST=0.0.0.0"
Environment="OLLAMA_DEBUG=1"
- Reload systemd by calling following commands:
$ sudo systemctl daemon-reload
$ sudo systemctl restart ollama
Windows
On Windows, Ollama inherits your user and system environment variables.
- First Quit Ollama by clicking on it in the task bar.
- Start the Settings (Windows 11) or Control Panel (Windows 10) application and search for environment variables.
- Click on Edit environment variables for your account.
- Edit or create a new variable for your user account for
OLLAMA_HOST,OLLAMA_MODELS, etc. - Click OK/Apply to save.
- Start the Ollama application from the Windows Start menu.
Nginx
server {
    listen 80;
    server_name example.com;  # Replace with your domain or IP
    location / {
        proxy_pass http://localhost:11434;
        proxy_set_header Host localhost:11434;
    }
}
Ngrok
Ollama can be accessed using a range of tools for tunneling tools. Run the following command for test purposes:
$ ngrok http 11434 --host-header="localhost:11434"
Alternatively, edit the Ngrok config file manually in ~/.config/ngrok/ngrok.yml or run the following command:
$ ngrok config edit
Grab your Ngrok token and free domain name and replace them in the config file:
version: 3
agent:
  authtoken: 2n*******************
tunnels:
  ollama:
    proto: http
    addr: 11434
    domain: example.ngrok.app
    request_header:
      add: ["Host: localhost:11434"]
Start your tunnel:
$ ngrok start ollama
# or
$ ngrok start --all
Run Ollama
$ ollama run llama3.2:3b
#or
$ ollama run mistral
If you want to monitor a Ollama geneartion performance:
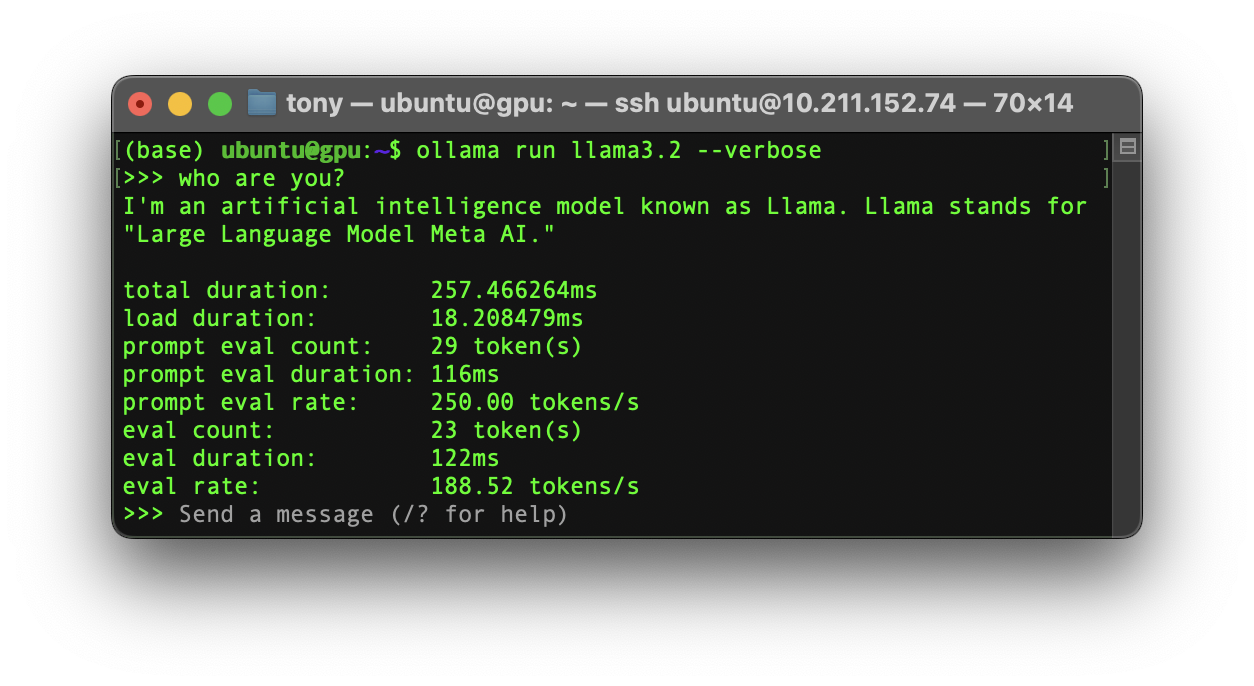
$ ollama run llama3.2 --verbose
API
Generate Embeddings
$ curl http://localhost:11434/api/embed -d '{
  "model": "nomic-embed-text",
  "input": "Why is the sky blue?"
}'
Multiple Text Inputs:
curl http://localhost:11434/api/embed -d '{
  "model": "all-minilm",
  "input": ["Why is the sky blue?", "Why is the grass green?"]
}'
Tags
curl http://localhost:11434/api/tags
How to troubleshoot issues
$ cat ~/.ollama/logs/server.log

#or

$ journalctl -u ollama --no-pager --follow --pager-end
FAQ
How can I tell if my model was loaded onto the GPU?
Use the ollama ps command to see what models are currently loaded into memory.
| NAME | ID | SIZE | PROCESSOR | UNTIL |
|---|---|---|---|---|
| llama3:70b | bcfb190ca3a7 | 42 GB | 100% GPU | 4 minutes from now |
How do I manage the maximum number of requests the Ollama server can queue?
If too many requests are sent to the server, it will respond with a 503 error indicating the server is overloaded. You can adjust how many requests may be queue by setting OLLAMA_MAX_QUEUE.
Where are models stored?
- macOS:
~/.ollama/models - Linux:
/usr/share/ollama/.ollama/models - Windows:
C:\Users\%username%\.ollama\models