Maintenance
Zabbix
What is Zabbix?
Sit commodi iste iure molestias qui amet voluptatem sed quaerat. Nostrum aut pariatur. Sint ipsa praesentium dolor error cumque velit tenetur.
Zabbix Server
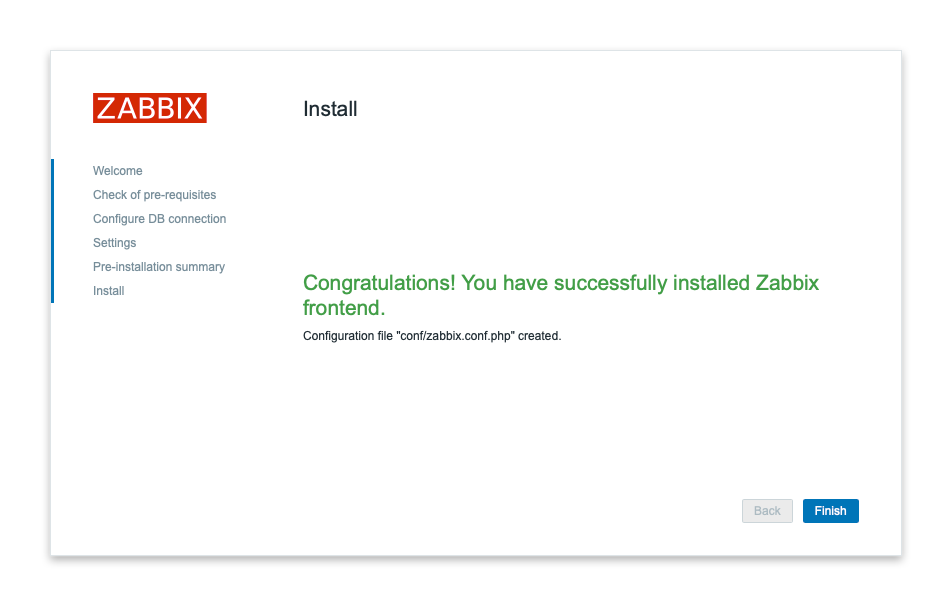
Installation
> sudo -s
> wget https://repo.zabbix.com/zabbix/7.0/ubuntu/pool/main/z/zabbix-release/zabbix-release_latest+ubuntu24.04_all.deb
> dpkg -i zabbix-release_latest+ubuntu24.04_all.deb
> apt update
Zabbix + PostgreSQL + Nginx
> sudo apt install zabbix-server-pgsql zabbix-frontend-php \
    php8.3-pgsql zabbix-nginx-conf zabbix-sql-scripts zabbix-agent
Zabbix + PostgreSQL + Apache
> sudo apt install zabbix-server-pgsql zabbix-frontend-php \
    php8.3-pgsql zabbix-apache-conf zabbix-sql-scripts zabbix-agent
Zabbix + MySQL + Nginx
> sudo apt install zabbix-server-mysql zabbix-frontend-php \
    zabbix-nginx-conf zabbix-sql-scripts zabbix-agent
> mysql -uroot -p
password
mysql> create database zabbix character set utf8mb4 collate utf8mb4_bin;
mysql> create user zabbix@localhost identified by 'password';
mysql> grant all privileges on zabbix.* to zabbix@localhost;
mysql> set global log_bin_trust_function_creators = 1;
mysql> quit;
> zcat /usr/share/zabbix-sql-scripts/mysql/server.sql.gz | mysql --default-character-set=utf8mb4 -uzabbix -p zabbix
Zabbix + MySQL + Apache
> sudo apt install zabbix-server-mysql zabbix-frontend-php \
    zabbix-apache-conf zabbix-sql-scripts zabbix-agent

> mysql -uroot -p
password
mysql> create database zabbix character set utf8mb4 collate utf8mb4_bin;
mysql> create user zabbix@localhost identified by 'password';
mysql> grant all privileges on zabbix.* to zabbix@localhost;
mysql> set global log_bin_trust_function_creators = 1;
mysql> quit;
> zcat /usr/share/zabbix-sql-scripts/mysql/server.sql.gz | mysql --default-character-set=utf8mb4 -uzabbix -p zabbix

# Disable log_bin_trust_function_creators option after importing database schema.

> mysql -uroot -p
password
mysql> set global log_bin_trust_function_creators = 0;
mysql> quit;
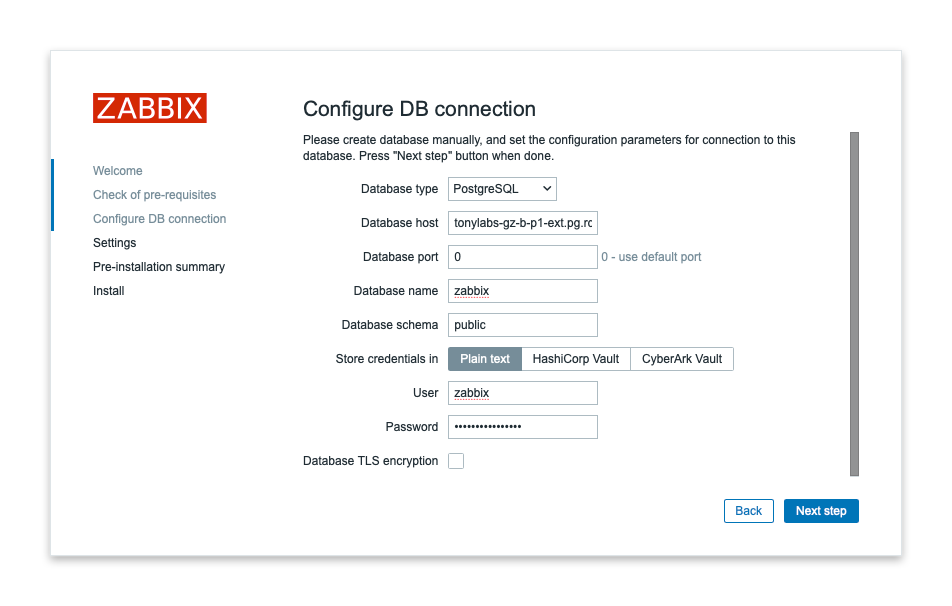
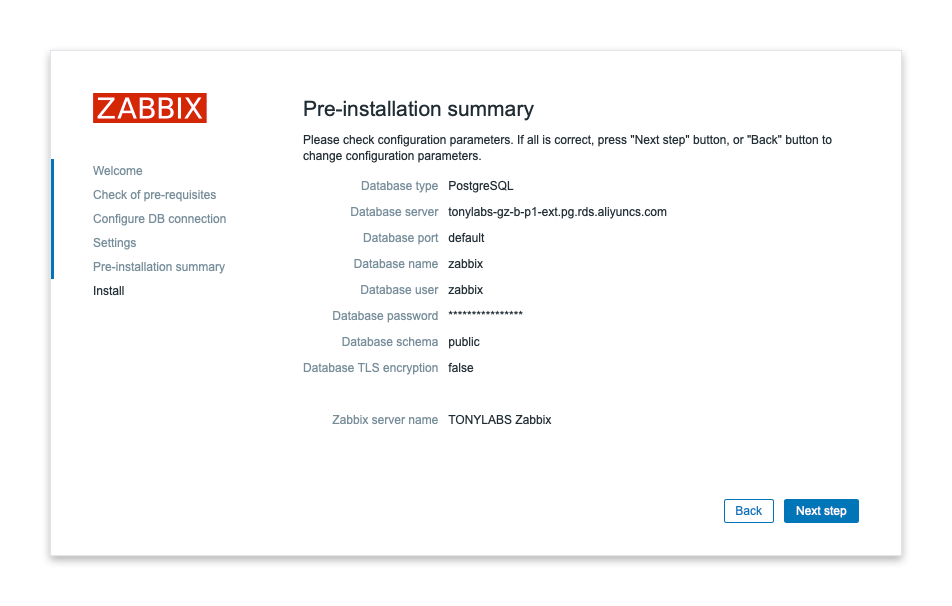
Database
Remote PostgreSQL
Zabbix can be configured to use a remote PostgreSQL database. Replace your PostgreSQL server hostname (-h), username (-U), and password in the following command. Use same region ECS and RDS for better performance.
> sudo apt install postgresql-client
> zcat /usr/share/zabbix-sql-scripts/postgresql/server.sql.gz | PGPASSWORD='********' psql -h ********.pg.rds.com -U zabbixuser -d zabbixdb
MariaDB
> sudo apt install mariadb-server -y
> sudo systemctl start mariadb
> sudo systemctl enable mariadb
Remote MySQL Server
> sudo apt install mysql-client -y
> zcat /usr/share/zabbix-sql-scripts/mysql/server.sql.gz | \
mysql --default-character-set=utf8mb4 -h xxxxxxx.mysql.rds.aliyuncs.com -uzabbix -p zabbix
Local MySQL Server
> sudo apt install mysql-server -y
> sudo systemctl start mysql
> sudo systemctl enable mysql

> mysql -uroot -p
password
mysql> create database zabbix character set utf8mb4 collate utf8mb4_bin;
mysql> create user zabbix@localhost identified by 'password';
mysql> grant all privileges on zabbix.* to zabbix@localhost;
mysql> set global log_bin_trust_function_creators = 1;
mysql> quit;
> zcat /usr/share/zabbix-sql-scripts/mysql/server.sql.gz | mysql --default-character-set=utf8mb4 -uzabbix -p zabbix

# Disable log_bin_trust_function_creators option after importing database schema.

> mysql -uroot -p
password
mysql> set global log_bin_trust_function_creators = 0;
mysql> quit;
Configuration
Edit the Zabbix server configuration file.
> sudo nano /etc/zabbix/zabbix_server.conf
Update the following lines:
DBHost=
DBName=zabbix
DBSchema=public # PostgreSQL only
DBUser=zabbix
DBPassword=
Start Zabbix server and agent processes and make it start at system boot.
> sudo systemctl restart zabbix-server zabbix-agent nginx php8.3-fpm
> sudo systemctl enable zabbix-server zabbix-agent nginx php8.3-fpm
PHP
Edit PHP 8.3 PHP-FPM configuration file.
> sudo nano /etc/php/8.3/fpm/php.ini
Modify the following lines:
max_execution_time = 300
memory_limit = 512M
post_max_size = 16M
upload_max_filesize = 2M
max_input_time = 300
date.timezone = "Asia/Shanghai"
Nginx
Remove the default nginx configuration file.
> sudo rm /etc/nginx/sites-enabled/default
Edit file sudo nano /etc/zabbix/nginx.conf uncomment and set 'listen' and 'server_name' directives.
> listen 8080;
> server_name example.com;
> sudo apt install certbot python3-certbot-nginx -y
> sudo certbot --nginx
Test the Nginx configuration and restart the Nginx service.
> nginx -t
> sudo systemctl restart nginx
Setup
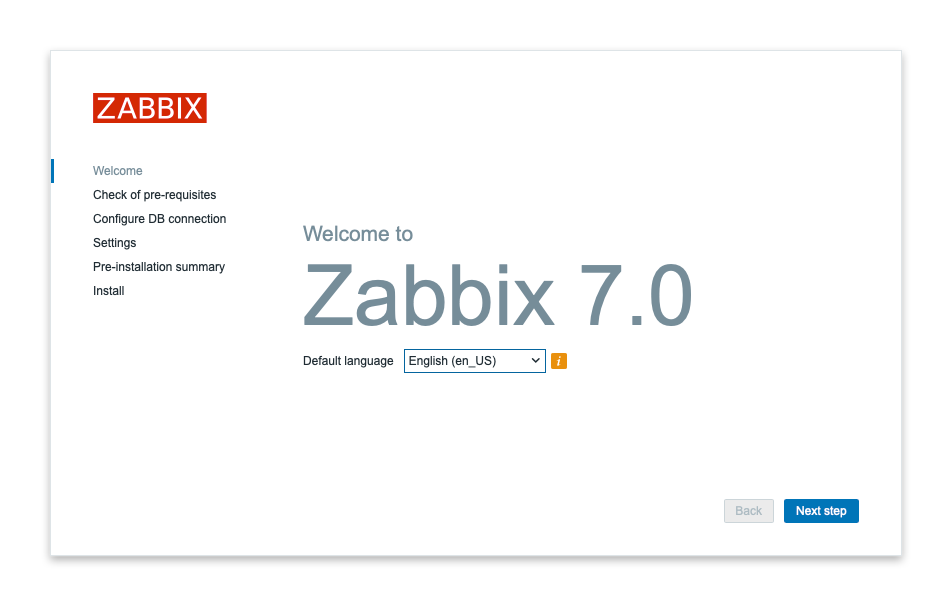
Open your browser and navigate to https://zabbix.example.com.
First Login
Default administrator credentials Admin : zabbix.
Zabbix Server Log
You can find the Zabbix server log at /var/log/zabbix/zabbix_server.log.
> tail -F /var/log/zabbix/zabbix_server.log
Zabbix Client
Installation
> sudo -s
Ubuntu 24.04 (Noble):
> wget https://repo.zabbix.com/zabbix/7.0/ubuntu/pool/main/z/zabbix-release/zabbix-release_latest+ubuntu24.04_all.deb
> dpkg -i zabbix-release_latest+ubuntu24.04_all.deb
> apt update
Ubuntu 22.04 (Jammy):
> wget https://repo.zabbix.com/zabbix/7.0/ubuntu/pool/main/z/zabbix-release/zabbix-release_latest+ubuntu22.04_all.deb
> sudo dpkg -i zabbix-release_latest+ubuntu22.04_all.deb
> sudo apt update
Ubuntu ARM64 24.04 (Noble):
> wget https://repo.zabbix.com/zabbix/7.0/ubuntu-arm64/pool/main/z/zabbix-release/zabbix-release_latest+ubuntu24.04_all.deb
> dpkg -i zabbix-release_latest+ubuntu24.04_all.deb
> apt update
Install Agent
> sudo apt install zabbix-agent2
Configure Agent
> sudo nano /etc/zabbix/zabbix_agent2.conf
Adjust the following properties:
- Server= Write the hostname of your ZABBIX server here
- ServerActive= Write the hostname of your ZABBIX server here
- Hostname= Write the hostname of your CURRENT server here
Examples:
Server=127.0.0.1,192.168.1.0/24,::1,2001:db8::/32,zabbix.example.com
Restart the Zabbix agent service and make it start at system boot.
> sudo systemctl restart zabbix-agent2
> sudo systemctl enable zabbix-agent2
Check Zabbix Agent Status:
> sudo systemctl restart zabbix-agent2
Check Zabbix Agent 2 logs:
> tail -f /var/log/zabbix/zabbix_agent2.log
Add Host
Log in to the Zabbix web interface and add the target server as a monitored host:
- Go to Configuration > Hosts.
- Click Create host.
- Fill in the following details:
- Hostname: Should match the Hostname in the agent configuration.
- Visible name (optional): Friendly name for the server.
- Groups: Select a host group (e.g., Linux servers).
- Agent interfaces: Enter the IP address of the target server.
- Click on Templates and link the appropriate template (e.g., Template OS Linux).
- Save the configuration.
Uninstall Agent
> sudo systemctl stop zabbix-agent2
> sudo systemctl disable zabbix-agent2
> sudo apt remove --purge zabbix-agent*
Synchronizing state of zabbix-agent.service with SysV service script with /usr/lib/systemd/systemd-sysv-install. Executing: /usr/lib/systemd/systemd-sysv-install disable zabbix-agent2 Removed "/etc/systemd/system/multi-user.target.wants/zabbix-agent2.service".
Remove the config file and logs:
> sudo rm -rf /etc/zabbix/
> sudo rm -rf /var/log/zabbix/